Quilting
A quilt is essentially a fabric “sandwich.” It has a top that is often pieced or appliquéd with a design, a middle that is composed of batting, and a back that is often a plain, solid fabric. The “sandwich” is held together by quilting stitches that go through all three layers of fabric.
- As with many other crafts, start with simple designs at first. As your experience and confidence increase, you can move on to more complex designs.
- Try enlarging patterns and designs using a copier or computer software.
- Ziploc plastic bags come in various sizes and can help separate colors or cut pieces.
- To help with cutting pieces of cloth, create a cutting template out of firm plastic or colored foam, in solid (not patterned), bright colors.
- If you have low vision, place contrasting tape along the edges of the template or piece of fabric to make it easier to see. You can also use thread that contrasts with the material, a swing-arm lamp, or another adjustable light source.
- Try a variety of needle threaders or needle threading techniques.
- Quilting needles are very thin and short needles with extremely small eyes and are available in sizes #9, #10, #12, and up.
- “Betweens” or Embroidery needles are longer, have larger eyes to help threading, and can also be used for quilting.
- Expert quilters claim that smaller needles make smaller stitches, but be sure you are comfortable with whatever size needle you use.
- Use a variety of fabrics to make the quilt tactually interesting (and visually stimulating!)
- Be aware, however, that some fabrics cannot be washed and should not be used as part of a quilt that will require frequent cleaning.
- Wash all of your fabrics before starting the project. A beautiful quilt can be ruined by washing it after completion and finding that the fabric shrinks unevenly or the colors bleed.
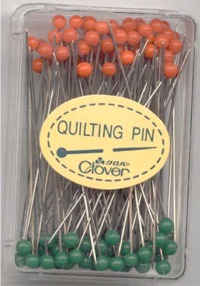
- To help maintain a straight sewing line, use 1/4-inch tape or make a line of quilting pins. Quilting pins (usually two inches long) are longer than regular straight pins and have large round glass heads. These features help the pins stay in place and hold the thick quilting layers together. The larger heads make them easier to feel and locate.
- This tactile/visual pin line can guide your sewing and can easily be moved along as you sew. If you use tape, do not keep it attached to the fabric for an extended period because the glue will migrate to and stain the fabric.
- Safety pins may be easier to use to hold the project together.
- Even stitches are most prized and small, even stitches are the ultimate goal, with 16-20 stitches per inch (8 above and 8 below the quilt).
- As a new quilter or as a quilter who is blind or low vision, strive for even stitches — smaller stitches will come with practice and experience.
- You can sign your quilt by using an adapted signature guide.
Quilt Care Tips
- As quilts age, brown spots can begin to appear in the fabric. This is triggered by exposure to sunlight, which causes acid in the fabric to rise to the surface.
- As little as four hours of direct sunlight can initiate this process, although the spots may not appear for several years.
- Gently washing the quilt will often remove the spots for another several years.
- Dust is also problematic for quilts. Dust particles have microscopic sharp edges and, over time, will cut the threads of the quilt fabric and erode the top.
- Quilts can be “dusted” by covering the nozzle of your vacuum with fabric and gently vacuuming the entire quilt.
- Quilts should not be stored for long periods in plastic coverings. A pillowcase or sheet wrapped around the quilt is usually sufficient.
- Wooden chests or boxes are also not recommended because oils from the wood will eventually bleed into the fabric and cause staining that cannot be removed.
- Acid-free paper and acid-free boxes are recommended for proper quilt storage.
- Air drying is the recommended method for cleaning a quilt. Place the quilt on a clothesline, folded in half, exposing the back, making sure it remains in the shade.
- To machine wash a quilt, use cold water and the gentle or soak/rinse cycle. Do not use the spin cycle, which can damage a fragile quilt. Press out excess water with your hands and do not twist or wring the fabric.
- To dry, lay the quilt flat on the grass on top of a sheet and in the shade. Do not hang the quilt on a clothesline because the weight of the quilt will cause the stitches to break.
- Because it is a chemical process, dry cleaning is not recommended for quilts.
Source: Nancy Paskin, M.Ed., CVRT