Repairing a Loose Chair Rung
Using glue to repair a loose chair rung is certainly doable by a person who is blind or has low vision. Throughout the repair process, it’s helpful to keep your fingertips and hands free of glue, which can coat your fingers, reduce your tactual sensitivity, and make it difficult to feel the surfaces and contours of your work project.
Adaptations for Using Glue
Suggestions and adaptations that can help make using glue more manageable include:
- Cover the work area with paper or a drop cloth to protect the floor from dripping glue.
- Keep hand wipes or paper towels and water within arm’s reach of the work area to keep your fingers and hands clean throughout the repair. It’s also helpful to keep a wastebasket or other receptacle nearby to hold used hand wipes or paper towels.
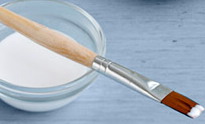
- Place a small amount of glue in a plastic medicine cup, fast food ketchup container, a small shallow glass bowl, or a recycled aluminum margarine container. Apply glue to the work surface with a small artist’s paintbrush with stiff bristles.
- If you can’t see the application brush or the tip of the glue bottle, try using your fingertip to apply a thin coat of glue to the end of the rung and inside the hole. When the glue becomes “tacky,” apply another coat, clean your hands and fingers, and then insert the rung into the hole of the chair leg.
- For additional work preparation tips, see our Home Repairs Safety and Preparation Checklist.
Adaptations for the Work Project
Next, here are some tips and adaptations that can help you with this work project:
- Use any of the above methods to apply glue to the end of the rung and inside the hole.
- Tighten the rung with either (a) a bar clamp or (b) twine/string that you’ve wrapped around the two chair legs.
- If you use twine or string, clamp/hold the connection tight by twisting the string with a dowel or a screwdriver until the glue dries.
- Use a wet cloth or paper towel to clean up any excess glue before it dries.
Additional Gluing Tips
Additional household gluing and safety tips include:
- Some glue emits harmful vapors and must be used with proper ventilation.
- Some glues are flammable and should not be exposed to heat or used near a heating source or open flame.
- For simple household gluing tasks, such as sealing envelopes or placing photos into a scrapbook or album, try using a glue stick, which can be easier to manage and control than liquid glue.
- If you have low vision, glue sticks are available in colors that can provide moderate contrast with the paper or work surface. All colored glue sticks dry, either clear or white.
- Note: Most glue sticks require a longer drying and usually do not adhere well to heavy wood or plastic.
- Many types of glue require 24 hours to dry completely. Ensure your repair is completely dry before subjecting it to use or pressure.