Hints for Easier Eating and Pouring
Use the Clock Reference System
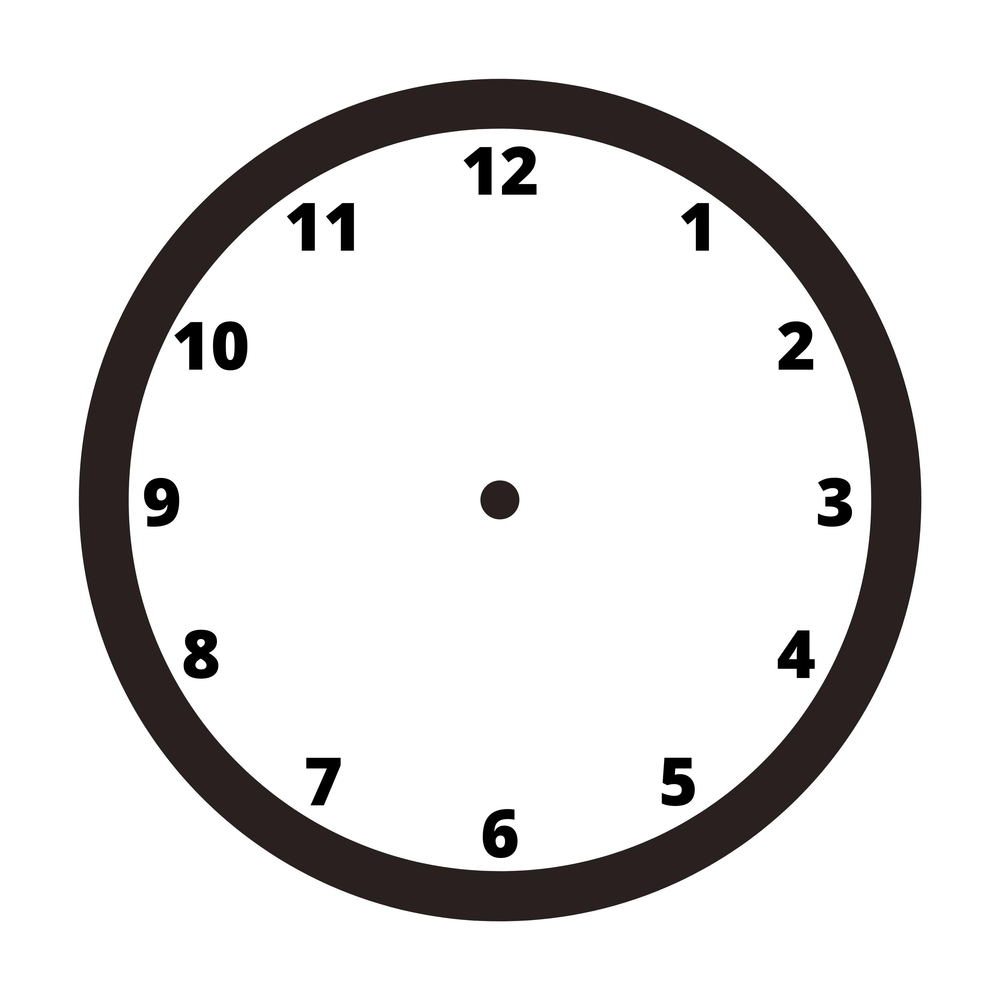
Using the clock reference system is one way to tell what food is on your plate. Think of your plate as a clock face with 12:00 at the top (the edge farthest away) and 6:00 at the bottom (the closest edge).
This reference system can also help you form a mental picture of where each food item is on your plate.
Additional Eating Skills and Tips
- Use a tray or placemat to help maintain your orientation to your place setting. Place a napkin in your lap to protect your clothing.
- Use the locating technique to safely, effectively, and discreetly explore your place setting.
- When returning a cup to a saucer, locate the saucer with one hand and place the cup with your other hand.
- Use your fork and the tip of your knife to periodically check the location and arrangement of the food on your plate. Push food items back toward the center of your plate if they’ve gravitated outward toward the edges.
- Use solid foods like mashed potatoes as a “buffer” or barrier to help push food onto your fork. You can also use a knife or a piece of bread as a buffer.
- The tip of your knife can also indicate the size of the meat or any other food item that requires cutting.
- The weight of the food on your fork or spoon can help indicate the size of the portion.
- When scooping with a fork, press the tines down into and under your food; you will feel a “dragging” sensation if the food item is not entirely cut and severed from the main piece.
Tips for Cutting Meat
- Make sure the cutting edge of your knife blade is facing downward before you cut or slice. You can identify the cutting edge of the knife blade without touching it. Since the cutting edge is usually curved, try rocking the blade forward and backward on the tabletop to determine when the cutting edge (which will rock) is facing downward.
- If you place the non-cutting edge against the tabletop, the knife will flush against the surface, not rock.
- Try turning your plate so that your meat is at the 6:00 position. If you’re not reaching over other foods, it can sometimes make cutting easier.
- To cut meat, such as a pork or lamb chop, locate one edge of the meat with your knife and keep your knife there. Put your fork into the chop about a half inch from the edge and, starting at the edge, cut a small semicircle around your fork. Keep your knife at the edge of the meat while you eat the cut piece, and then repeat the process. With very little practice, it will become automatic.
- When placing your order at a restaurant, ask to have your meat cut before it is brought to the table.
Tips for Spreading and Serving
- If you can’t see how much butter is on the butter dish, you can glide your knife blade lightly across the top to get an idea of where to cut into it.
- Sometimes, depending on the consistency of what you are spreading, it is easier to use a spoon to apply, as in the case of peanut butter.
- Ask what dish you are receiving, and tell the next person what it is when you pass it on. This will serve as a reminder to the people at your table to identify the dishes.
- When serving yourself, run your fingertips around the top rim of the bowl to locate the serving spoon. Place the serving dish on the table next to your plate if possible. If not, hold the serving dish just above your plate and a bit to the side. This will make the transfer of food more accessible.
- When you’re done serving yourself, it’s okay to ask, “Where can I set this dish?”
Using Salt and Pepper
Here are some techniques to help with using salt and pepper:
- Salt weighs more than an equivalent amount of pepper.
- The salt shaker usually has larger perforations.
- Salt has a different sound when shaken because the textures of salt and pepper differ. Salt sounds “looser” and more granular than pepper.
- Use different-shaped shakers for each, or place a rubber band around one.
- To control the flow of salt, shake some into your palm and explore the amount with your pinky finger.
- You can also pour salt into your palm and pinch out small amounts or extend your hand over your plate with your palm down and your fingers spread while you shake the salt over your spread-out fingers.
Pouring Cold Liquids
- Place your index finger at the cup’s rim or glass to feel the liquid rising to the top (Note: This technique is used with cold liquids only).
- Listen for the sound of liquid entering the container and for sound changes as the liquid reaches the top rim of the cup or glass.
- Wrap your hand around the glass or cup and feel for temperature changes as the liquid level rises.
- Begin practicing with a shorter glass or cup with a wide mouth.
- Try pouring from a pitcher with a spout.
Pouring Hot Liquids
- The Sunbeam Hot Shot Beverage Maker heats 12 ounces of water in about 90 seconds at the touch of a button. It makes piping hot water for coffee, cereals, soups, cocoa, or tea.
- Microwave one cup of water for two and one-half minutes.
- Pre-measure the desired quantity of water and pour it through your automatic coffee maker with the filter basket in place.
- Fill a kettle with the desired amount of water (one cup, for example) before heating and pouring.
Pouring Hot and Cold Liquids
- Electronic liquid level indicators can help you pour hot and cold liquids by making a persistent noise and/or vibrating when the liquid in a glass or cup is a certain distance from the top rim.
- To reduce spilling, place the lip of the container you are pouring from against the rim of the container you are pouring into.
- Pour slowly at first and gradually increase your speed as your skills improve with practice.
- Become aware of the temperature change on the side of a glass or cup as the liquid rises.
- Practice with a variety of containers.
- Never hold the cup or glass in the air while pouring; instead, place the cup or glass on a level surface. This helps to avoid spills and burns.
- Use color contrast to make liquids more visible if you have low vision. Use a light-colored mug for coffee and a darker glass or cup for milk. Keep your body aligned with the table edge or countertop while pouring.
- Try pouring with the pitcher/kettle/coffee pot in the sink and the glass or cup on the adjoining countertop. This can make lifting the pitcher or kettle easier and help with spills and cleanup.
- Place the cup or glass on a tray with sides or a lip, so that any spills are contained on the tray. Wipe up any spills immediately.
- When entertaining friends or family, ask each person to pour his or her own beverage.
Additional Resources for Eating Skills
- You can contact a Vision Rehabilitation Therapist for additional instruction in eating skills.
- Go to Vision Rehabilitation Services to learn about the full range of professionals and instructional services for these daily living skills.
By Maureen A. Duffy, M.S., CVRT